
Picture the moment. A minute ago your client's arm held. Now it's down by their side, they're looking at you with one eyebrow up, and you'd love to tell them they're wrong. The trouble is that you can't be certain. Maybe you did lean in a little more, or held on a second longer because part of you expected the arm to go.
That moment is where muscle testing gets its bad name, and it comes from a habit I call the arm wrestle: a test whose result depends on who is pushing harder on the day. It can creep into anybody's testing, and a handful of rules will train it out again.
Every school of muscle testing has its own way of doing things. What follows are the habits I use to keep a test consistent from one check to the next, and most of them will carry straight into whatever approach you already use.
What the arm wrestle looks like
You'll recognise it from three things. The force changes from one test to the next. The position drifts, so the arm is a little higher, the elbow a little softer and your hand is somewhere new. And then there's the big one, where the joint has locked, the client has done exactly what was asked, and the practitioner keeps on leaning until something gives. By then you're measuring your own bodyweight, and your client can feel it. A deliberate break test is a different procedure with its own rules. The trouble starts when the procedure changes between the test and the retest without you meaning it to.
One test, two jobs
A muscle test does two jobs in my sessions, and they're read in opposite ways. The first is the orthopaedic one. I put a joint in a position and ask a simple question: can you lock this joint when I ask? I'm not assessing strength in the way you would if you were testing somebody's back squat or bench press. I'm looking at whether the nervous system can drive that muscle hard enough, on request, to hold the joint for a moment. If it locks, that's a pass. If it gives, or if the contraction hurts, that's a failed test, and you never push on into pain to find out more. You're not trying to break the muscle or force the joint back to where it started. Once you feel the joint lock, you have your answer.
What I tell my students is simple: meet and match the force. It isn't a competition for who is stronger. You're only checking whether they can voluntarily contract the muscle in question.
The second job is using a strong muscle as a feedback marker. I start with an arm that I know will lock, give the body an input somewhere else, and test the same arm again. Now I'm watching for a change, and a strong arm that gives for a moment is the finding. When students mix those two jobs up, they end up telling a client their deltoid is weak when the deltoid was never what the test was asking about.
The rules I test by
1. The client starts, and you meet and match
Plenty of muscle testing systems have the practitioner start the push, and that leans the test towards the reflexes in the muscle. It's a debate I don't want to get bogged down in. In AMN I want to look at voluntary drive, so I do it the other way round. I ask the client to push or pull and to build into it gradually, then I feel their force arrive in my hand and give the same amount back. It also stops me catching somebody a split second before they're ready and writing down a failed test that was really a late start.
2. Fit the force to the person, then keep it the same
If you're working with a six foot six rugby player, you're obviously going to use more force than with a small-framed person who doesn't really exercise, because a feather-light push won't ask a strong limb whether the muscle is really holding the joint. Find that level, then keep it identical left, right and on the retest. Once the joint has locked you have your answer, so finish the test.
Time matters as much as force. A second or two is plenty, and it needs to be the same on every test. The easiest trap in muscle testing is to hang on a little longer on the test you expect to fail and to let go early on the one you're hoping will pass.
There's a simple reason not to mix styles. In 1988 the physiotherapy researcher Richard Bohannon used a hand-held dynamometer on the elbow flexors of 27 young women to compare a "make" test, where the tester holds still while the person pushes, with a "break" test, where the tester pushes until the arm gives. Both were consistent on their own, but the break tests produced clearly higher peak forces. So if you meet and match on the first test and try to break the lock on the retest, you aren't repeating the same test.
3. Same position, same line of force, same hands
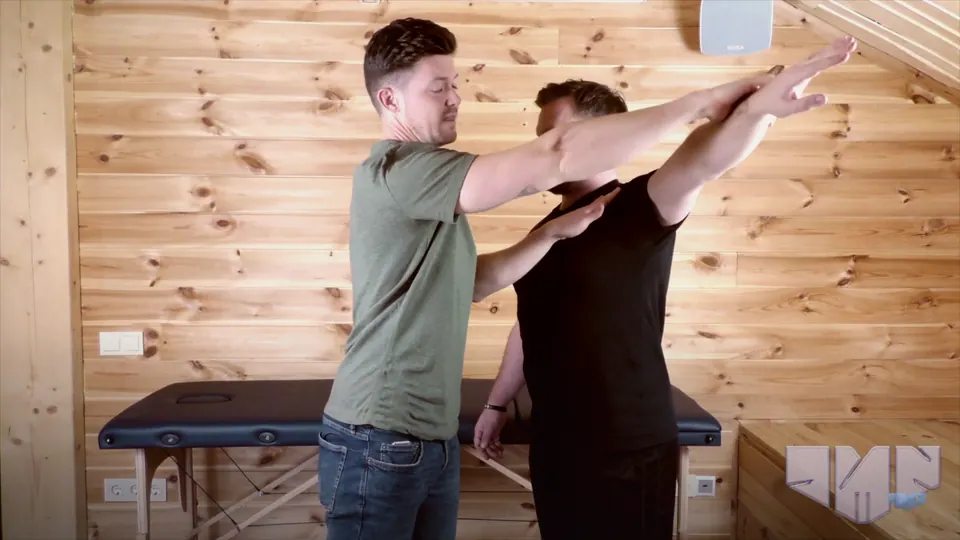
Take the straight-arm shoulder test. The arm is raised in front to roughly horizontal, the elbow is locked, the wrist is relaxed, and I stabilise the back of the opposite shoulder. My contact is light, a couple of fingers at the wrist with no squeezing, and my line of force goes slightly down and in, on a diagonal towards the hip on the same side.
Whatever test you use, decide on the position, the contact, the direction and the words, and run it that way every time. Keep the chatter out of it too, because what you say during a test is an input of its own. If the body twists or a neighbouring muscle tries to join in, clean up the position and take the test again, and give the client three to five seconds of rest between tests.
4. Keep your hands off the muscle you're testing
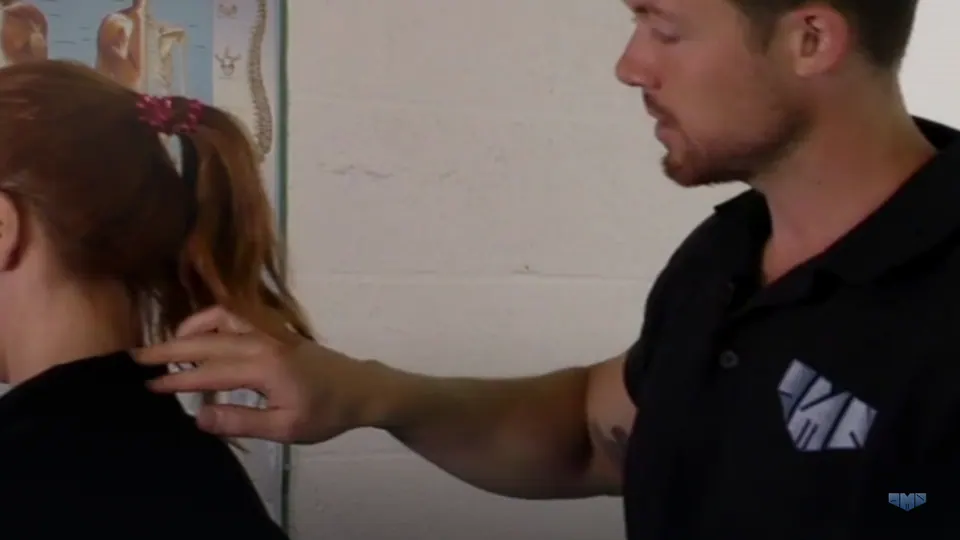
When I test glute max, the client lies face down with the knee bent and lifts the thigh off the couch, and my testing hand goes on the hamstring and my other hand stabilises the opposite side of the low back. Touch is an input, and contact on a muscle can change how it responds for a moment, which leaves you with a muddled finding.
5. Head, neck and eyes in neutral
Clients love to watch. They turn their head towards your hand or look down at their own arm, and the moment they do, you're testing whatever head, neck and eye position they've adopted and not the muscle. For a stand-alone test I give them a spot on the wall straight ahead.
6. Compare left and right, and write down what you find
One side on its own tells you very little. Compare left and right straight away, so you and your client can both see and feel any difference between the sides.
When a muscle won't hold, don't rescue the test. Ask the plain question: can they voluntarily contract this muscle right now? If the answer is no, that's information you record. In practice it means they couldn't hold the position against my matched force today, and it goes in the notes with the side, the position and any pain.
Before I trust the arm as feedback
If I'm going to use an arm as a feedback marker, I want to know two things first. The first is that it locks on its own, because an arm that can't lock to begin with tells me nothing by giving way later. Straight-arm shoulder flexion is my usual choice, but the lats or triceps work well if the shoulder isn't an option.
The second is a quick check I call getting the client "online". I start with the arm opposite to my marker. The client raises it with the elbow locked and pushes up into my hand, and while they push I tap the front of that shoulder, over the anterior deltoid, for about three seconds. They relax, and then I test the marker arm in the normal way, with the client building gradually while I meet and match.
This time I expect the marker arm to give. My model for it is walking. As one arm swings forward the other swings back, so firing the front of one shoulder should quieten the other side for a moment, a normal crossed inhibition. That's a model, and a muscle test can't prove it, but it gives me a practical rule: if the marker arm stays strong, I don't use it as feedback yet.
When that happens I work through a short list. I ask them to close their eyes and open and close each hand as wide and as fast as they can ten times, and I compare the sides for stutters, stalls and fatigue. I watch both eyes follow my fingertip in towards the bridge of the nose, to see whether each comes in smoothly. If one eye doesn't come in to the midline, I cover the other eye and have the lagging one follow my fingertip in and across, all the way to the midline, through a slightly exaggerated range. If one hand is slower, stutters or tires sooner, I use a quick eye drill: the client holds one thumb in the centre of their vision and the other hand up on a diagonal towards the slower side, then flicks their eyes between the two, about once a second, ten times, with the head still. Then I run the shoulder check again.
Test, input, retest
Everything above serves one routine. You test, you apply a single input, whether that's a movement or eye drill, a stretch, or a sensory input such as tapping on bone, and then you retest with everything identical: position, line of force, hands, hold time, words, head and eyes. Then ask the client whether they felt a difference.
A retest shows you that something changed. It doesn't show you why, and a muscle test is not a diagnostic test. If nothing changed, write that down as well and try a different input. After a good retest, don't send the client straight into high-level work. Progress gradually and keep reassessing.
When Bohannon reviewed nine studies of manual muscle testing in 2018, his conclusion was that reliable assessments of strength may be obtained but not assumed. Those studies graded strength, which is a different job from the feedback use, but the point carries over. Reliability has to be built into how you test.
Try this with your next client
- Ask before you touch, and explain the test in a sentence: "Push into my hand and I'll match you. Tell me straight away if anything hurts."
- Give them a spot on the wall straight ahead, set the position, and check they can hold it on their own before you add any force. If they can't, or if it hurts, that's your finding.
- Stabilise with one hand and make a light contact with the other, away from the muscle in question.
- Say "push" and let them build. Meet and match for a second or two along the same line, and finish as soon as the joint locks.
- Rest for a few seconds, test the other side, and record both as lock, give or pain.
- If one side gave way, apply your input, then retest both sides with everything the same and record what happened, including "no change".
When a client says "you just pushed harder"
It's a fair question, so treat it as one. "I can't measure force with my hands, which is exactly why I keep everything else the same. Let's do it again in the same position, with your eyes on the same spot. You build the push gradually and I'll match you, then we'll do the other side so you can compare."
Can you muscle test yourself?
A question we were asked recently is whether you can muscle test yourself. You can, with one honest catch: the same brain is doing the pushing and the resisting, so it's even easier to fool yourself than it is with a client. Keep everything identical and treat what you feel as information, the same as you would with anyone else.
The test I use on myself these days is a low shoulder flexion test, and I teach it in Level 2. The arm is straight and just below 45 degrees, with the elbow locked, the wrist straight and two fingers of the other hand resting on top. You push the arm up into the two fingers and simply meet the resistance. What you're feeling for is a small give where there was a lock. It takes practice to become sensitive to it, so persevere. If you want something you can see, use a range-of-motion marker instead, such as shoulder internal rotation against a mark on the wall, standing on the same spot with your eyes straight ahead. It's more objective, though I find it a little cumbersome.
See it for yourself
To watch a test, an input and a retest in one take, start with the free Calibrate Screening Tools mini class. The Corrective Exercise Specialist certification takes you through the whole muscle testing flow, along with the online check described above.